Now that we are fixing to move into an older home I wanted to find some, in my own words, really good wood tables that wouldn't fall apart at the first step of a toddler's foot...Is there even a table that can handle a toddler?
All the stores around here carry cheap wood. We had been to the antique stores to look and found nothing. So, when my John called one day and said he had found a living room suit with end tables at a thrift store. I wasn't very surprised. I thought, "Okay, what do we need another living room suit for?"
But, we decided that he could get the couches and chair for his work shop at the house, when all his friends come over to visit. And I get the end tables.
The only problem I had with them was they were green and scratched up. And that started the wheels in motion. "How about some sanding and painting to match my living room furniture?", I thought. Well here's some photo's of what I spent 2 weeks doing...
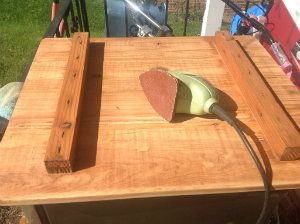
This is a close up of what the tables looked like before and the sander of course!

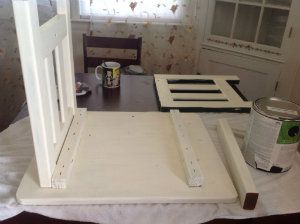
I have to admit, I took these tables apart to sand and paint them. They were loose anyways, so it gave me a reason to tighten them up. I had to move the painting inside because of the mosquito's outside.

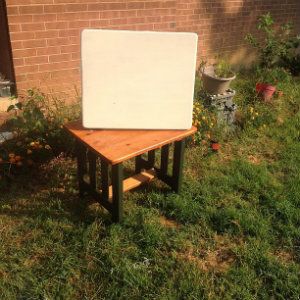
I used a color called, Parchment, because I wanted to go for a antique look. I used about 2 layers on the top and about 5 layers on the legs. John finally told me after I got halfway into the project that I should of primed them first...Here's a before and after of the tables. Tables cost me $12.00 a piece and $28.00 for the paint. So, for $52.00 I got some fabulous wood tables to make all into my own!

holy moly..just wish I was crafty..I have a daughter that is ..she didnt get it from me..love your ideas and the fact that you implement them..thanks for sharing..keep up the good work ..what great ideas for those that will follow..
ReplyDeleteI didn't realize you were so handy! Well done....
ReplyDeleteMaybe you could drop by my house.......lol
ReplyDeleteMichelle, I always enjoy seeing your refinishing jobs! Another great post! An inspiration to create!
ReplyDeleteThanks everyone! Okay Tracey I need a couple of days away from the kids anyways:)
ReplyDeleteCreating yourself makes wonderful memories and priceless keepsakes.
ReplyDeleteFun rewarding and great work
ReplyDeleteYou are so clever!
ReplyDeleteGorgeous. Come do mine. The reason I cant see mine is because its covered with crafts. lol .. My beloved dining room table is where all my treasures are. :) Keep on creating and happy sales. Kimberly @ www.kimisjewelryandgifts.blogspot.com
ReplyDeleteClever....
ReplyDeleteI love crafts, but I love useable crafts the best. Looks great. Glad you had fun with it.
ReplyDelete